Sunday, 10 November 2013

Custom SIC Caucasus tutorial part 2

All right, to summarise part 1 (link to part 1:http://kriderworld.blogspot.sg/2013/11/sic-kamen-rider-caucasus-custom.html ); we have done up the giant shoulder pad and most of the face. So lets continue.


There is actually a step for the giant shoulder pad i have not explained in part 1. Previously i have mentioned that to connect that 3 pieces of putty layered plastic sheets to form the front, back and upper layer of the giant shoulder i used a lump of plastic/rubber as base. What I didnt elaborate was that I used a gashapon one piece layzner back pack to make that base. I broke the layzner arm joint before this so it was pretty much useless and I got a much bigger version anyway. See photo below, thats not a one piece version but a bigger version. I just wanted to point out which part i used. The part is the one highlighted in yellow lines. Its a thruster-like backpack thing. I used that as a base for the 3 putty/plastic sheet parts to be glued on to form the giant shoulder pad.


 The good thing about using this layzner part is i like how i can position those thrusters as  part of the inner design of the shoulder pad. Imagine Caucasus can have a boost in his jump or rider kick with those thrusters ;p And the layzner part also protrude out of the top of the shoulder pad (see the grey part of the pad in the photo below) forming some sort of design for the shoulder pad. I have made some changes on the top as well by adding in some glued in plastic sheets that forms a sort of vent (again see photos below).


Once all that was done, add a silver layer of paint on the shoulder pad followed by metallic yellow paint. The parts of the layzner and the plastic sheet vents i colored them with iron color paint.

The photo below shows how the layzner thruster looks like. I also added a piece of cut up small vent part from kabuto's original inner shoulder pad to add to the design. Voila the shoulder pad is done :)
 
The final part is of course forming the head sculpt. The last thing i need to do after forming those whiskers and detail along the middle of his face, was his middle horn protruding out of his forehead.
 
As a first layer, I added putty on him to form a horn like sculpt, see photo below. You dont need to be precise or anything but you must leave a hole right at the front center of the horn as that part forms the indent to insert the blue "pimple" on him later.
 
The final layer after the first layer dried was to properly form the horn as it should be. See photo below. After this layer dried, i used my paper knife to cut the front center indent into a hole as seen in photo below. Let everything dry. At this time i started using small pieces of putty to form a few round balls to form the front blue "pimple". I made several balls just to make sure one of these balls is the right size to be used later on. I let these dry as well.
 
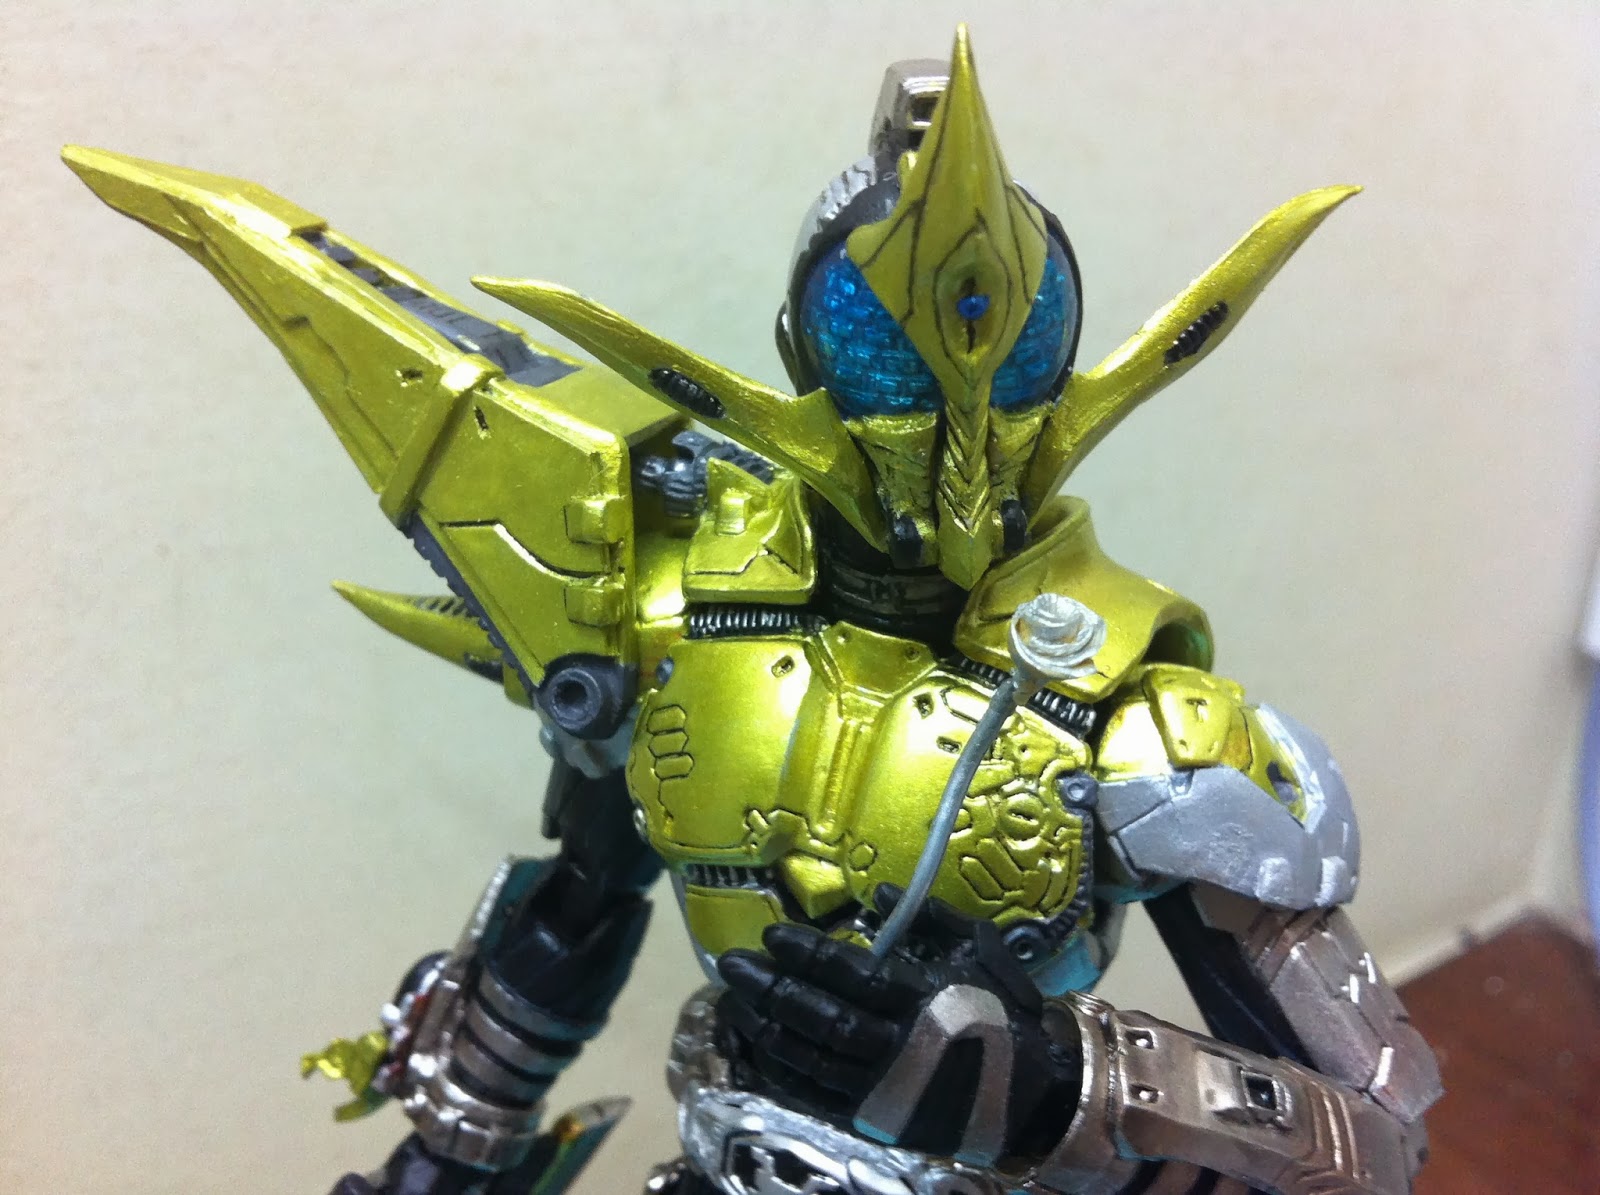
Finally, I added a small portion of putty on that front center hole to form the indent. Before the putty dries up, i use a right sized putty ball and pushed it half into the surface of the putty indent to form the blue pimple you see in the photo below. Let everything dry again. I then used my line engraver to carve lines on the horn. Its finally done. I used sand paper to sand every thing and make sure the horn's edges are sharp to make it look distinct. Again paint first layer silver and metallic yellow as final last couple of layers. Paint the pimple with metallic blue. Paint the eyes with clear blue. Voila we are done with the head!


Caucasus's beetle is different from kabuto's. Kabuto is a horned beetle where as caucasus is a ... err different kind of beetle. So some modifications were in order. I used kabuto's beetle and cut up the main horn into 2 pieces and re-glued them on to the sides of the beetle. The parts are cushioned by some tiny rubber pieces i cut up to make that two side horns facing front. I also add some small piece of putty on the back of the beetle to smoothen it. Repaint the whole beetle black and metallic yellow and added the zect logo design on the carapace. Glue the beetle on caucasus lower arm. Done! :D


Oh one final detail, Caucasus loves blue roses for reasons unknown. He cant even smell it in his armor probably zzz but its his symbol so you cant do without it and I needed to make it.

I used a piece of wire as its stalk. I then use a tiny roll of putty to form the rose itself. First I flatten the roll of putty and leave it like that for half an hour. Then when its a little more dry and harder, I slowly and painstakingly roll it into a form of a rose. I then attach it onto the wire. I use tiny pieces of putties to form its leaves. Before attaching it to the wire, I used my paper knife to cut the leaves pattern. After everything dried, color it silver and then green and blue.
 
And there you have it, SIC Caucasus! :D Pls enjoy the remaining photo album below. See you next time!


 Note: yeaaa i messed up the zect logo on his beetle coz i was using a frayed old brush to paint it at that time and didnt bother to buy a new one


EDIT:

I finally painted the rose up ;p
 

Custom Neo Zecter Mobile Weapon Platform!!!


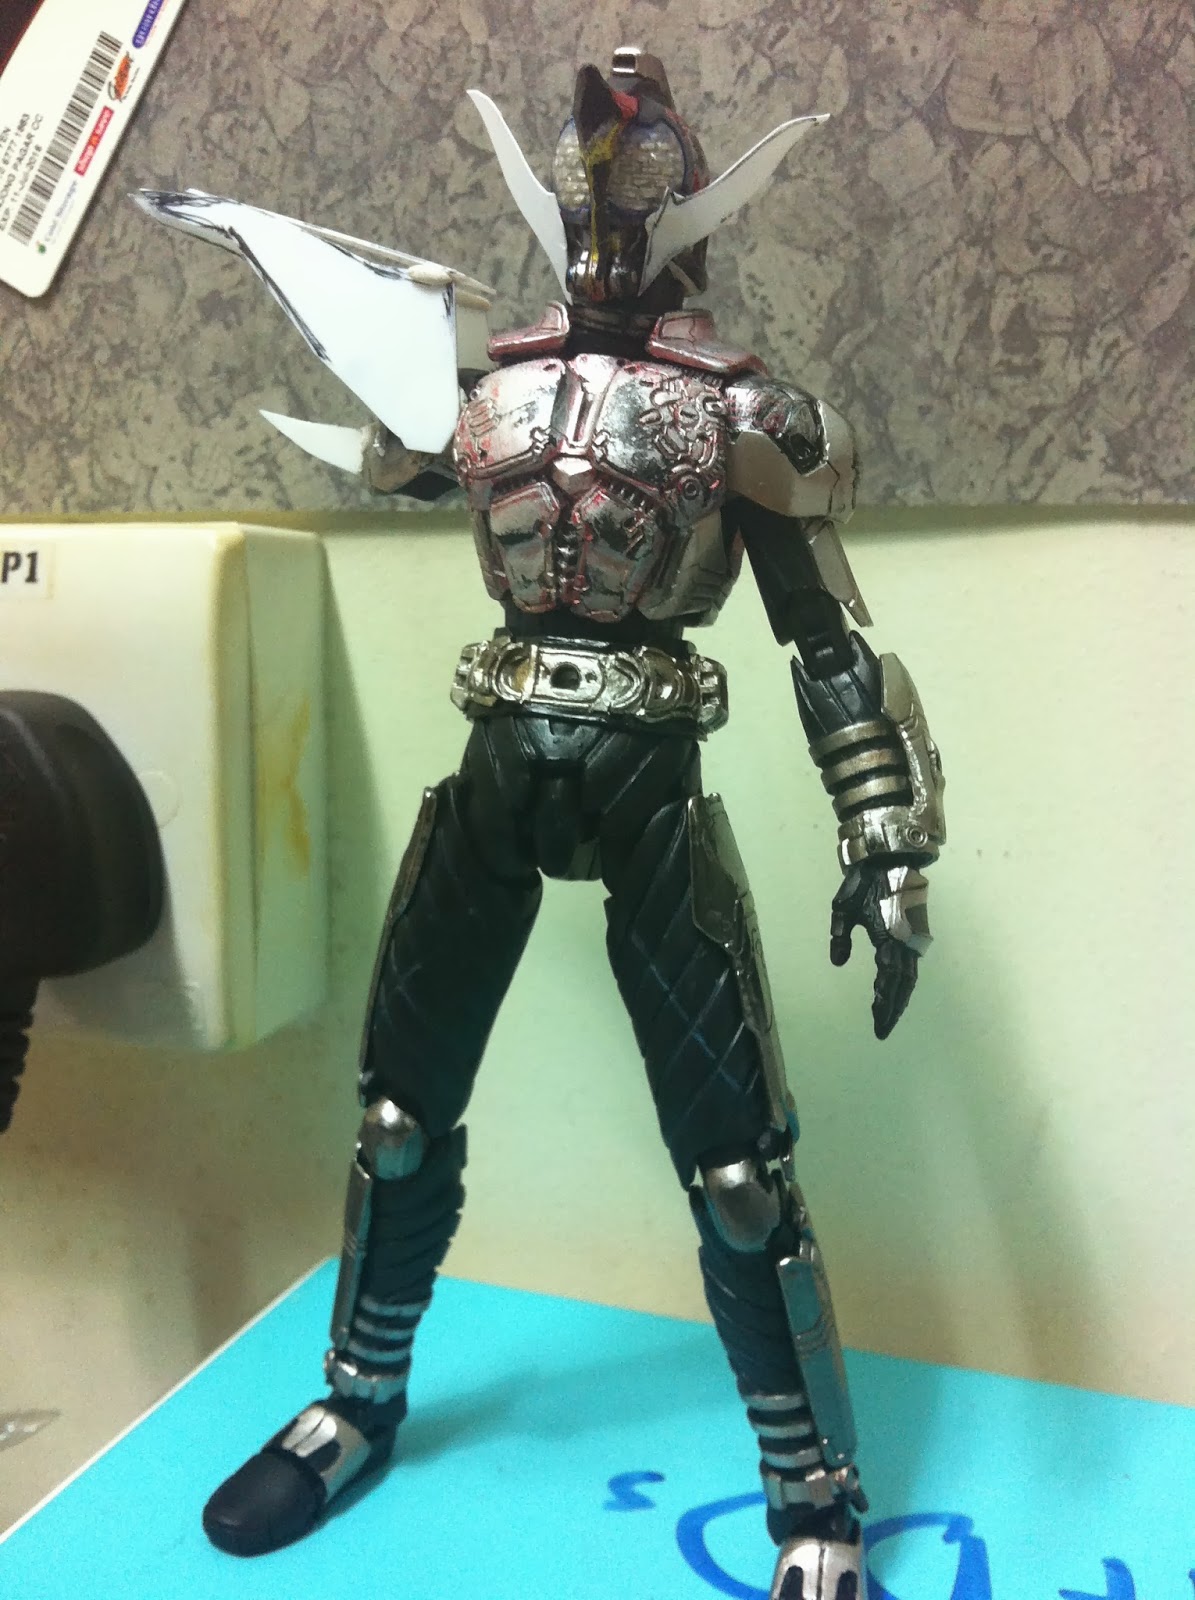
A friend of mine did a custom Neo Zecter Ant Weapon and I was fascinated with it. So I took my own spare parts and clumped one myself:
After I tested the design with blue tags i found that i have created a ... cockroach!!! I HATE COCKROACHES!!!

Luckily a fren helpfully pointed out i missed the middle torso for an ant body ;p I finally realised whats wrong with my cockroach. i mean my neo zecter weapon ;p
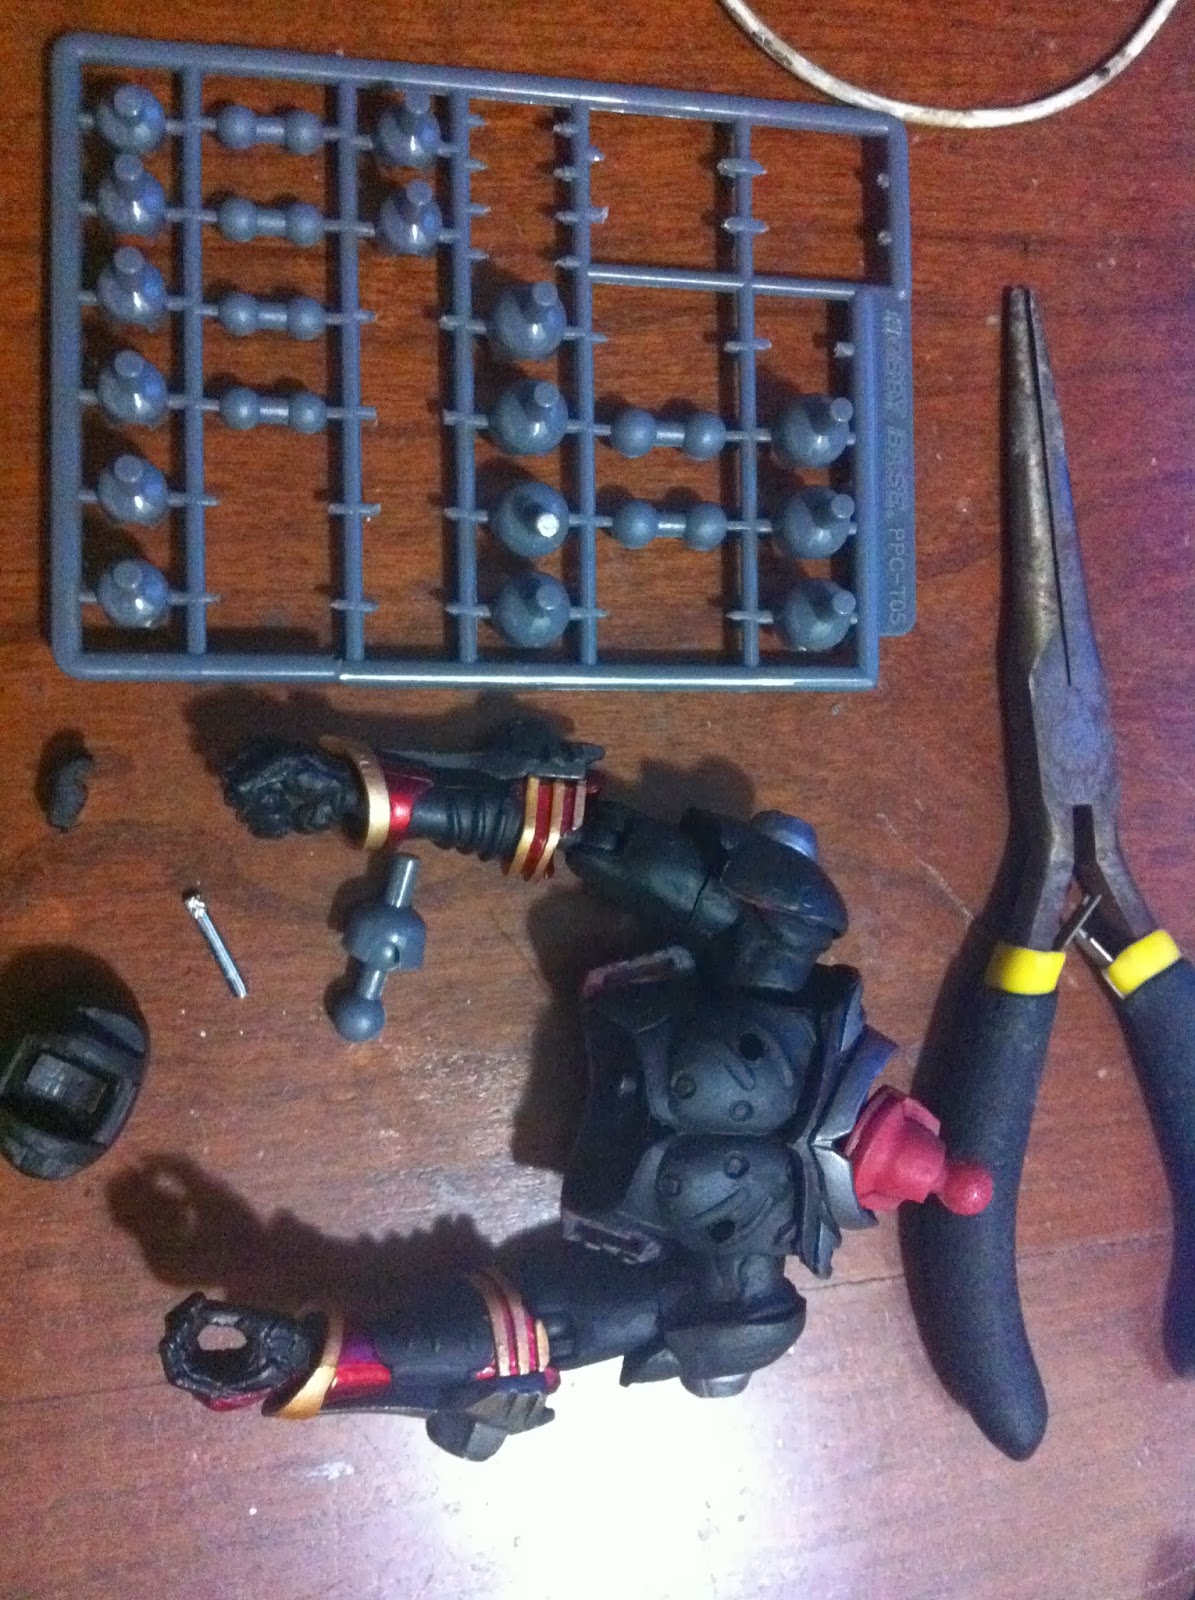
So I took some parts and meddle and mix it and came up with something else :D

What I did above was i took Zectrooper machine gun and inverted his position on the shield to make it like the cockr... i mean bug has a machine gun sprouting from his arse ;p.

The legs came from parts of a Macfarlane Interlink robot (see photo below). Same goes for the machine gun lower cover (not in pic above but you can see it in later photos below) and those wires.


I used double ball joints bought from HLJ.com as connectors between the bug head to the torso and the torso to the arse/shield. I actually did something very wrong here. I glued the ball joint to the head and the arse. I should have glue the socket joint to the head and ball joint to the arse so sthat they can still be reconnected as a weapon for neo zectrooper. Darn but whats done is done. I could repair it but dont see a point since i wont display it together with neo zectrooper. Anyway i cover all the putty and secure them with putty and painted them all black and iron colors.

And the result came out much satisfying thant the previous cockroach lookalike:

Then a friend suggested me to add wings on it which was a great idea. So I added kabuto's wings and add it on with blue tag to test it . The result was even better than i liked :D

I also made a small stand for it using some gashapon stand i have.


The final product was done using a replicated kabuto wings as I dont have enough original kabuto wings to make it. I used oyumaru resin to make a mold with the original wings and 5 minute epoxy to make the replica wings. I glued in the replica wings and added some thorns on his torso voila done :)

Wednesday, 6 November 2013

S.I.C Kamen Rider Caucasus Custom tutorial part 1


Custom S.I.C Kamen Rider Caucasus


Yes its that blue rose totting wierd guy's turn. His only appearance was in Kabuto movie God Speed Love as the main protagonist. Frankly speaking i dont like Caucasus, his existence has no meaning other than loving blue roses and perfection which has nothing to do with his purpose of causing a meteor impact on earth that will mutate the Worms :/ I could be wrong since I never watch any kabuto series and i speed watch the God Speed Love movie ;p But you cant deny his nice design as a rider that lovely yellowwwww..


Still that didnt encourage me to make one since I saw in Hong Kong, SPC shop was selling Caucasus, Ketaros and another guy (can't remember his name) at a reasonable price (At that time i have already ran out of luggage space buying all other stuff and decided to skip these riders, not to mention the SPC sculpt seemed off and wierd)


Then, a friend of mine challenged me that I cant make a custom Caucasus in a week's time. And so being a sporting guy, I took the challenge but promise i wont work more than 1 hour per night on it. I can't anyway due to my actual work commitment and the fact that putty needs to be dried ;p


I did managed to finish it in 1 week's time and came up with a better way to connect the giant shoulder pad to his body thanks to a suggestion from another customiser, Miko Matsing :D


So lets get to the tutorial as usual :D


First off, I need a base body and the best i felt to be used is Kabuto itself. This might seemed wasteful so you might try using a Dark Kabuto body instead. But I like Kabuto's more intricate chest piece design.


Then, I know the most time consuming part would be the giant shoulder so i went about thinking how to make one. I decided to use plastic sheets as their base and then layer the sheets with putty to add designs. I also used plastic sheets for his moustache as well.


The one thing I don't like about existing custom versions of Caucasus is that their gigantic shoulder pads are stuck to their shoulders and hence limiting upward and sideways movement for the arm. Then a friend of mine suggested to use a double joint system for the gigantic shoulder pad and connect the joint to the body. And thats what i did :D I used the following joint for this purpose.


These joints have become increasingly useful to me as time past as a joint to replace even SIC broken joints or use as a replacement joints for Garo etc etc sometimes they become joints to held things together such as weapons to SIC bodies or weapons with weapons :)

Anyway, I used a small joint from the set and glue one of the sockets to the chest armor's shoulder and layer it with putty designs. I also layer the joint itself with putty so i can put some micro designs on it.

I then glue the other socket joint to hte giant shoulder pad. But im getting ahead of myself. Lets talk about the giant shoulder pad construction first. 

For the giant shoulder pad you can already see from the photo above that the base are 3 plastic sheets; 2 sides and 1 top platforms. I then layer each of these with putty as a first layer. The 3 platforms are attached together with a block of resin I took from a gundam model as a base. I also putty up the 2 whiskers (the foundation are also plastic sheets) on his face. see photo below:


The putty on the giant shoulder pad is only the first layer. I add more layers on it with additional plastic sheets. These plastic sheets i cut them to create designs. 2 layers of plastic sheets were added each with some designs. The last part was to use putty to cover up those ugly indents created by 2 layers of plastic sheets plus more designs on the giant shoulder pads. And then we are done. Attach the giant shoulder pad socket wit hthe ball joints to the socket on the chest and you get Caucasus' shoudler pad. Fully poseable with 360 degree movement and removeable too ;)

Now the head needs a few layering of putties to do it due to its intricate designs. The whiskers were easy with one layer of putty on the plastic sheet to set the foundation and another layer of putty this time shaped with sharp edges as seen above. I cut grooves on the whiskers and added some wirings design on it. See photo above.

The small horn jutting out from his inner shoulder pad was made using 2 small plastic sheets glued together as a foundation and then layer it with putty sculpt.

For the head, first thing to do is  to cut away some of kabuto's original designs on that moveable horn attached to his head. Once you have done that you can start adding details to his mouth piece. There is a few layer of putties there and you need to sculpt each one and let them dry before you add the next to allow the details to be sharp and edgy, see the first layer in the photo below:
 
At the end you will get something like this:
I also cut lines onto that middle horn of his but regretted doing that now. It would have been much better if i have removed the entire horn and use putty to sculpt it. That way the lines wont come off as not even :( oh well live and learn

TO BE CONTINUED

ps: checking grammar is for pussies! so forgive me T_T