Here are the simple but tedious steps:
1) Pull out the chest piece from the body
2) Pry and pull out the abs piece from the stomach area (its secured by joint and some glue so you gotta pry it out hard. Just dont deform the piece too much from the prying)
3) Sand the lower legs, lower arms, the head and the scarf for repaint later
The Head
4) Use paint remover or thinner to remove the red tint on his eyes. Recolor it clear green
5) Repaint the head with (1) metallic silver layer. (2) metallic green layer, and a wash of clear green on certain areas (those which are more 'sunken' than the other areas).
6) Do panel linings
7) Repaint the antennas with a mixture of clear yellow, clear orange and clear red
8) Touch up any oer lapping paint
The Chest piece and the abs piece
1) Remove the paint on the front and back of the chestpiece with paint remover or thinner. This is going to take a while you need to remove the paint at the front of the chest very thoroughly.
2) Next paint a layer of metallic yellow paint at the back of the chest piece.
3) Paint the following layers at the front of the chest piece: (1) clear yellow (2) clear orange at the sides and certain lines and then (3) clear red (diluted) on the edges of the chest peice and certain linings near the edges. Make sure you let each layer dry completely before adding the next!
4) Reconnect the pieces onto the body. For the abs piece, if you didn't deform it too badly, it will easily fit back onto the connecting holes on the body.
The lower arms and legs:
1) Paint the following layers: (1) gloss yellow, (2) gold or brass, (3) clear yellow wash,
2) Do panel linings
3) Continue with a few more paint layers: (4) clear orange on edges, grooves and indents, (5) clear red on very deep groves and edges
4) Touch up on overlapping paint which will mostly be over the matt black areas or the hand joint areas
The scarf:
1) Just paint a layer of clear red over it to make it shine better
The belt:
1) Paint a clear red layer over the red parts
2) Do better panel linings on his belt buckle
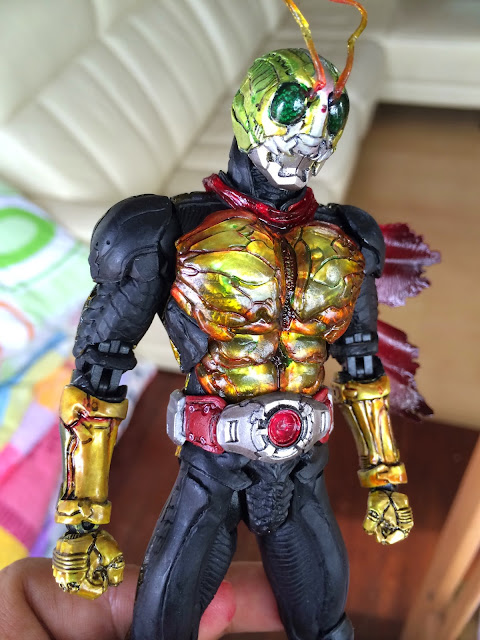
Aaaannnndd we're done :) Sounds easy enough? It is BUT extremely tedious. The result will be as follows, enjoy the photo gallery :)
Here are some photos of the original shin ichigo figure and the customed shin shocker for your viewing pleasure :)


No comments:
Post a Comment