Thursday 28 November 2013

Custom Kiwami Tamashii Dark Decade! or Negative Decade as some would like to call it

I bought a whole bunch of Kiwamis just last sunday and hey whats better to celebrate it then to make customs out of em ;p I didnt really know what to do with the Kiwami Decade i got until my friend who sold me those kiwamis suggested i do a negative Decade which appear in some game and the Negative Decade was suppose to be the real Decade while the one running around in the kamen rider universe is the doppleganger. I have no idea what all that means but hey  a dark decade sounds interesting.

So I scoured the internet for samples but couldnt find a kiwami dark decade although i found a couple of normal SIC Dark Decade customs which were really helpful in letting me understand which colors goes where. And so here goes:

First off use a hairdryer on the KT decade to loosen the joints and pull them all out. First thing i tried was to try to remove those green colors from the eyes coz if you cant remove those its game over man. Luckily it works. Using color remover i got most of the clear green off leaving a pair of clear eyes for recolor later.

Next, sand the entire body as much as possible to remove as much paint so that it wont have too much layers of paint on it and to allow my own paint to stay on better. Kiwamis are rather small i dont want too many paint layers on them.

Now do a quick wash with water over the sanded figure. Let it dry. Once dry add a coat of metallic silver on those areas you need to paint gold or dark iron. This woud be my primer layer. It gives better shine for subsequent layers of paint.


Let the silver layer dry. Then add clear blue paint over the eyes and the orb on his belt. Dont worry about overlapping paint its gonna happen a lot when you repaint a kiwami. Those overlapping blue will be taken care of as you add more dark iron or silver over them.

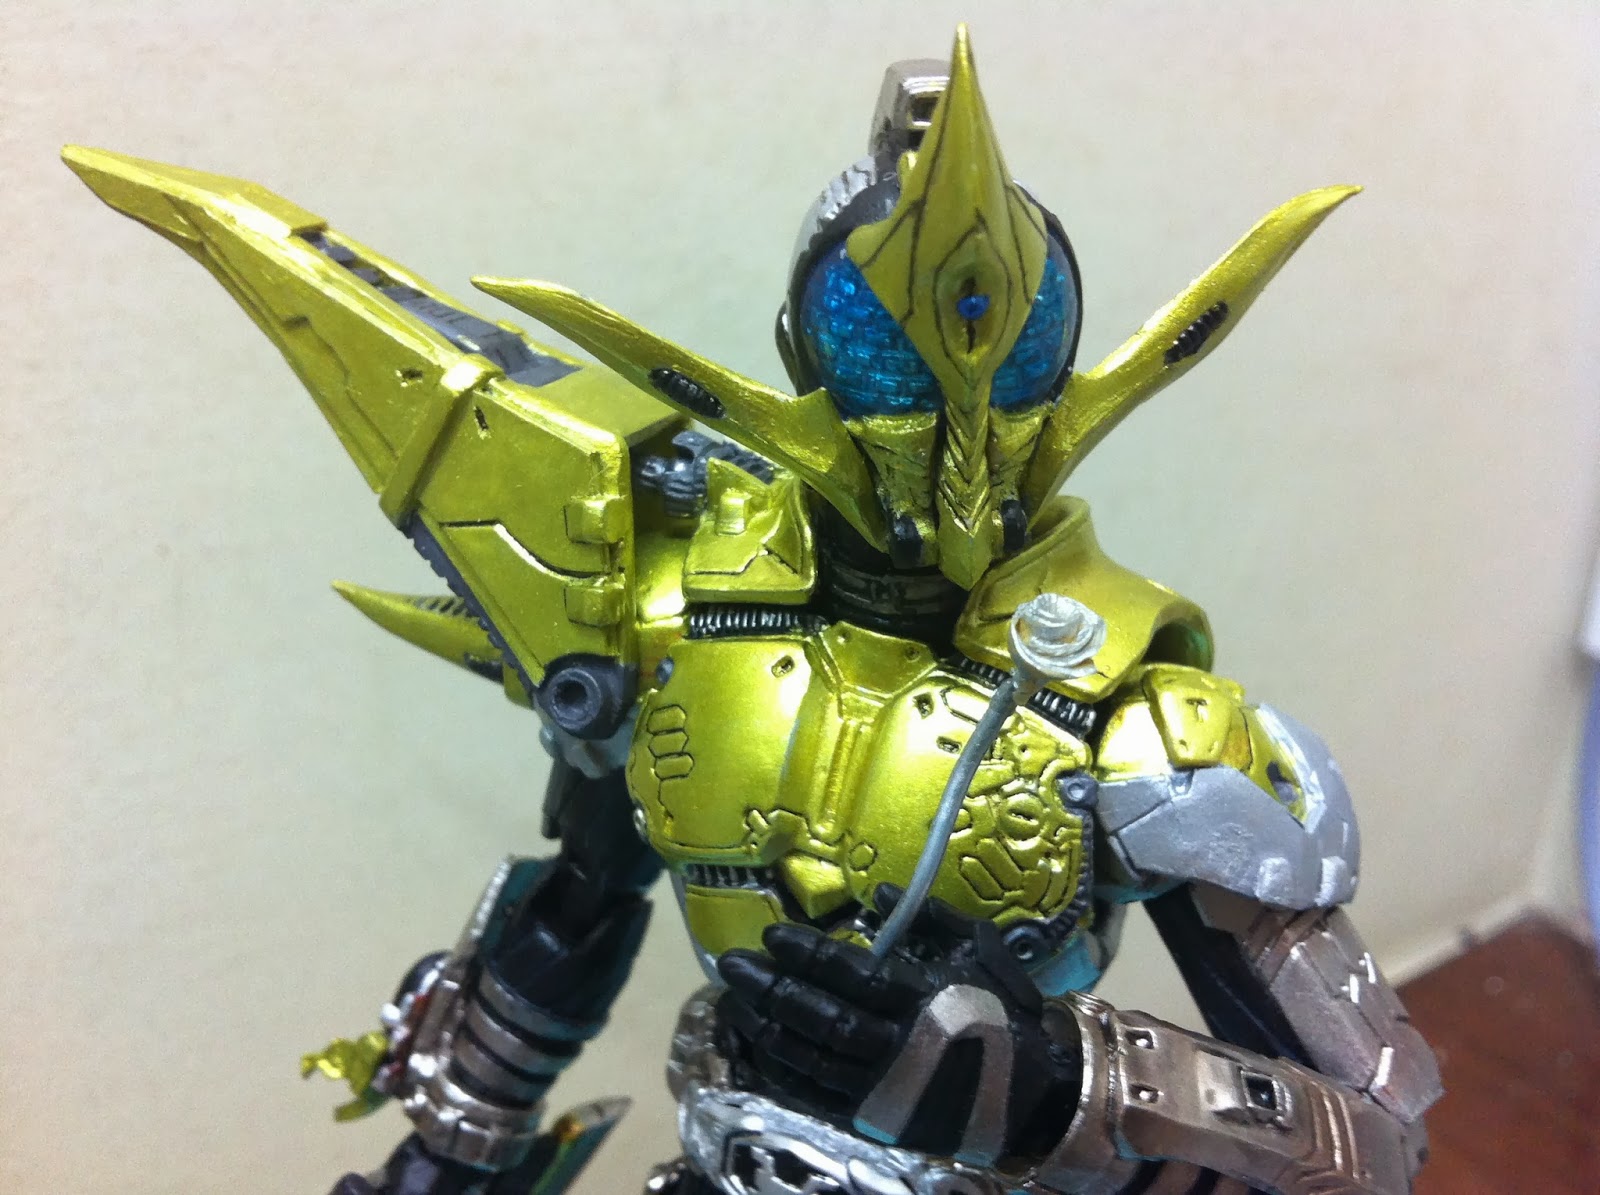
Alright, before you start with the next layer, have a look at those shoulder pads. Use a line engraver and carefully cut thin lines like in the photo shown below (the dotted red line area). Do it for both shoulder pads. This is to identify the gold lining part from the silver later on.


Once everything dries, start adding a coat of mixed brass and metallic yellow (30% metallic yellow) on those parts suppose to be looking gold. I personally prefer this mix than gold paint for some reason it seem shinier. You probably need to do a couple of coats in certain areas to make sure the brass/metallic yellow shows. Again dont worry about overlapping paint coz it will be taken care of later. Let everything dry. For figure painting, always remember its 3D, so remember to paint those small surfaces that is in the upper and lower areas of parts that juts out. For example those small surfaces that is between the double gold line sculpt on the shoulder pads.

For the body, I repaint metallic dark iron over the black to make it shine better. Same goes for the lower torso and the front of the belt surrounding the blue orb and parts of the legs and arms.

Now for the inner parts of the legs and arms, I mixed dark iron and silver to get a dark silver color . Paint this over the inner parts of the legs and inner arms. This time u gotta take care not to overlap since its the final layer. This layer will cover any brass/yellow paint that has overlapped. Do two light coats if you can. Let everything dry.

I touched up on the parts of the head that is suppose to be black with metallic dark iron. There we are almost done. Also I used a very thin dark iron paint (with like 60% thinner) to paint certain silver areas to look like they are shadows or burnt iron. You can see an example on the small surface on the right shoulder pad just below the brass/yellow line below. This give an impression of airbrushed areas.

See photo below. Let everything dry.
 
At this stage ill say you could actually stop right there and u already got a pretty good kiwami Dark Decade. You can see from the photo below how far you have came:
 
But hey if you dont push the limits you will never know how high you will go ;p so here we go. The final part was to give it more details by doing panel linings on his legs and arms and even his body.
 
Here comes the next part that i was initially not sure if it will work or not when i first started off.  For kiwamis, they are way too small to use any marker pens to line them so i used a washer paint. I tried it and even the washer itself was hard and it splotched as certain lines on the kiwami were really tiny. So when the panel linings dried, I cover those overlapping black paint with the same color as the surface the lines was on. For example, if the lines were on a silver surface, i use silver to cover those overrun black paint. I did panel linings on his legs and upper arm. I tried to panel line parts of his dark iron body but it didnt really show after it dried. After all this, cover the entire body with an overcoat to protect the paint.
 
I also painted those black colors on the head more properly and added the gold dot on his forehead. Voila its done. Took 2 nights to recolor it. For a small figure its a lot of trouble ;p Finally here's the finished product gallery:


Saturday 16 November 2013

Tutorial on How to repair broken Gouten leg (only the thigh joint though)

I think by now almost 80% of the existing Prop & Equip Gouten have at least one of their legs broken. Don't be surprise and think that "ahahaha my set is MISB! It is not broken haha!" and then when you open it, its broken right out of the box! Many a collectors already encountered this unpleasant incident already and i expect many more will too when they buy a misb set from another collector. Good news is, its not hard to fix the broken joint at all :D Im specificaly talking about the thigh joint connecting to the upper leg.

In this premise, I have prepared a short tutorial on how to fix the broken joint. I am sure there are a lot of ways to fix it but this one was easiest for me but it require a double ball joint that you can get from HLJ.com :)

See photo below where my gouten's front left thigh/leg joint was broken. The thigh was connected to the body via a circular joint with a metal rod (I have tkane out the not-broken back leg to see how it looks like when it is not broken). No way the leg can be joined back using just super glue.


I can't think of a way to just repair that broken circular wheel thingie so i went about replacing it with a different joint and i found the double ball joint from HLJ works best in this case.

First I used my blade to ply out that circular joint stuck to the body. I then use the double ball joint socket joint and sealed it on the hole where the circular joint used to be on the body using putty and super glue, see photo below.


Next I stuff putty onto the leg joint and then stuff the ball joint on it and let all of these dry.

Once the putty dried i added more super glue to make sure the joint are really secured.

Using a hairdryer i blow the joint to make it more easier to connect the ball joint on the leg and the socket joint on the body. Once its connected, Gouten looks exactly the same when he is not broken :D The added advantage is that ball joint connecting thigh and body makes the leg slightly more poseable than it used to :D

So there you go, hope you can repair yours too :)

Sunday 10 November 2013

Custom SIC Caucasus tutorial part 2

All right, to summarise part 1 (link to part 1:http://kriderworld.blogspot.sg/2013/11/sic-kamen-rider-caucasus-custom.html ); we have done up the giant shoulder pad and most of the face. So lets continue.


There is actually a step for the giant shoulder pad i have not explained in part 1. Previously i have mentioned that to connect that 3 pieces of putty layered plastic sheets to form the front, back and upper layer of the giant shoulder i used a lump of plastic/rubber as base. What I didnt elaborate was that I used a gashapon one piece layzner back pack to make that base. I broke the layzner arm joint before this so it was pretty much useless and I got a much bigger version anyway. See photo below, thats not a one piece version but a bigger version. I just wanted to point out which part i used. The part is the one highlighted in yellow lines. Its a thruster-like backpack thing. I used that as a base for the 3 putty/plastic sheet parts to be glued on to form the giant shoulder pad.


 The good thing about using this layzner part is i like how i can position those thrusters as  part of the inner design of the shoulder pad. Imagine Caucasus can have a boost in his jump or rider kick with those thrusters ;p And the layzner part also protrude out of the top of the shoulder pad (see the grey part of the pad in the photo below) forming some sort of design for the shoulder pad. I have made some changes on the top as well by adding in some glued in plastic sheets that forms a sort of vent (again see photos below).


Once all that was done, add a silver layer of paint on the shoulder pad followed by metallic yellow paint. The parts of the layzner and the plastic sheet vents i colored them with iron color paint.

The photo below shows how the layzner thruster looks like. I also added a piece of cut up small vent part from kabuto's original inner shoulder pad to add to the design. Voila the shoulder pad is done :)
 
The final part is of course forming the head sculpt. The last thing i need to do after forming those whiskers and detail along the middle of his face, was his middle horn protruding out of his forehead.
 
As a first layer, I added putty on him to form a horn like sculpt, see photo below. You dont need to be precise or anything but you must leave a hole right at the front center of the horn as that part forms the indent to insert the blue "pimple" on him later.
 
The final layer after the first layer dried was to properly form the horn as it should be. See photo below. After this layer dried, i used my paper knife to cut the front center indent into a hole as seen in photo below. Let everything dry. At this time i started using small pieces of putty to form a few round balls to form the front blue "pimple". I made several balls just to make sure one of these balls is the right size to be used later on. I let these dry as well.
 
Finally, I added a small portion of putty on that front center hole to form the indent. Before the putty dries up, i use a right sized putty ball and pushed it half into the surface of the putty indent to form the blue pimple you see in the photo below. Let everything dry again. I then used my line engraver to carve lines on the horn. Its finally done. I used sand paper to sand every thing and make sure the horn's edges are sharp to make it look distinct. Again paint first layer silver and metallic yellow as final last couple of layers. Paint the pimple with metallic blue. Paint the eyes with clear blue. Voila we are done with the head!


Caucasus's beetle is different from kabuto's. Kabuto is a horned beetle where as caucasus is a ... err different kind of beetle. So some modifications were in order. I used kabuto's beetle and cut up the main horn into 2 pieces and re-glued them on to the sides of the beetle. The parts are cushioned by some tiny rubber pieces i cut up to make that two side horns facing front. I also add some small piece of putty on the back of the beetle to smoothen it. Repaint the whole beetle black and metallic yellow and added the zect logo design on the carapace. Glue the beetle on caucasus lower arm. Done! :D


Oh one final detail, Caucasus loves blue roses for reasons unknown. He cant even smell it in his armor probably zzz but its his symbol so you cant do without it and I needed to make it.

I used a piece of wire as its stalk. I then use a tiny roll of putty to form the rose itself. First I flatten the roll of putty and leave it like that for half an hour. Then when its a little more dry and harder, I slowly and painstakingly roll it into a form of a rose. I then attach it onto the wire. I use tiny pieces of putties to form its leaves. Before attaching it to the wire, I used my paper knife to cut the leaves pattern. After everything dried, color it silver and then green and blue.
 
And there you have it, SIC Caucasus! :D Pls enjoy the remaining photo album below. See you next time!


 Note: yeaaa i messed up the zect logo on his beetle coz i was using a frayed old brush to paint it at that time and didnt bother to buy a new one


EDIT:

I finally painted the rose up ;p
 

Custom Neo Zecter Mobile Weapon Platform!!!


A friend of mine did a custom Neo Zecter Ant Weapon and I was fascinated with it. So I took my own spare parts and clumped one myself:
After I tested the design with blue tags i found that i have created a ... cockroach!!! I HATE COCKROACHES!!!

Luckily a fren helpfully pointed out i missed the middle torso for an ant body ;p I finally realised whats wrong with my cockroach. i mean my neo zecter weapon ;p

So I took some parts and meddle and mix it and came up with something else :D

What I did above was i took Zectrooper machine gun and inverted his position on the shield to make it like the cockr... i mean bug has a machine gun sprouting from his arse ;p.

The legs came from parts of a Macfarlane Interlink robot (see photo below). Same goes for the machine gun lower cover (not in pic above but you can see it in later photos below) and those wires.


I used double ball joints bought from HLJ.com as connectors between the bug head to the torso and the torso to the arse/shield. I actually did something very wrong here. I glued the ball joint to the head and the arse. I should have glue the socket joint to the head and ball joint to the arse so sthat they can still be reconnected as a weapon for neo zectrooper. Darn but whats done is done. I could repair it but dont see a point since i wont display it together with neo zectrooper. Anyway i cover all the putty and secure them with putty and painted them all black and iron colors.

And the result came out much satisfying thant the previous cockroach lookalike:

Then a friend suggested me to add wings on it which was a great idea. So I added kabuto's wings and add it on with blue tag to test it . The result was even better than i liked :D

I also made a small stand for it using some gashapon stand i have.


The final product was done using a replicated kabuto wings as I dont have enough original kabuto wings to make it. I used oyumaru resin to make a mold with the original wings and 5 minute epoxy to make the replica wings. I glued in the replica wings and added some thorns on his torso voila done :)