Showing posts with label tokusatsu. Show all posts

Sunday, 2 November 2014

Custom Weathered Jetslinger


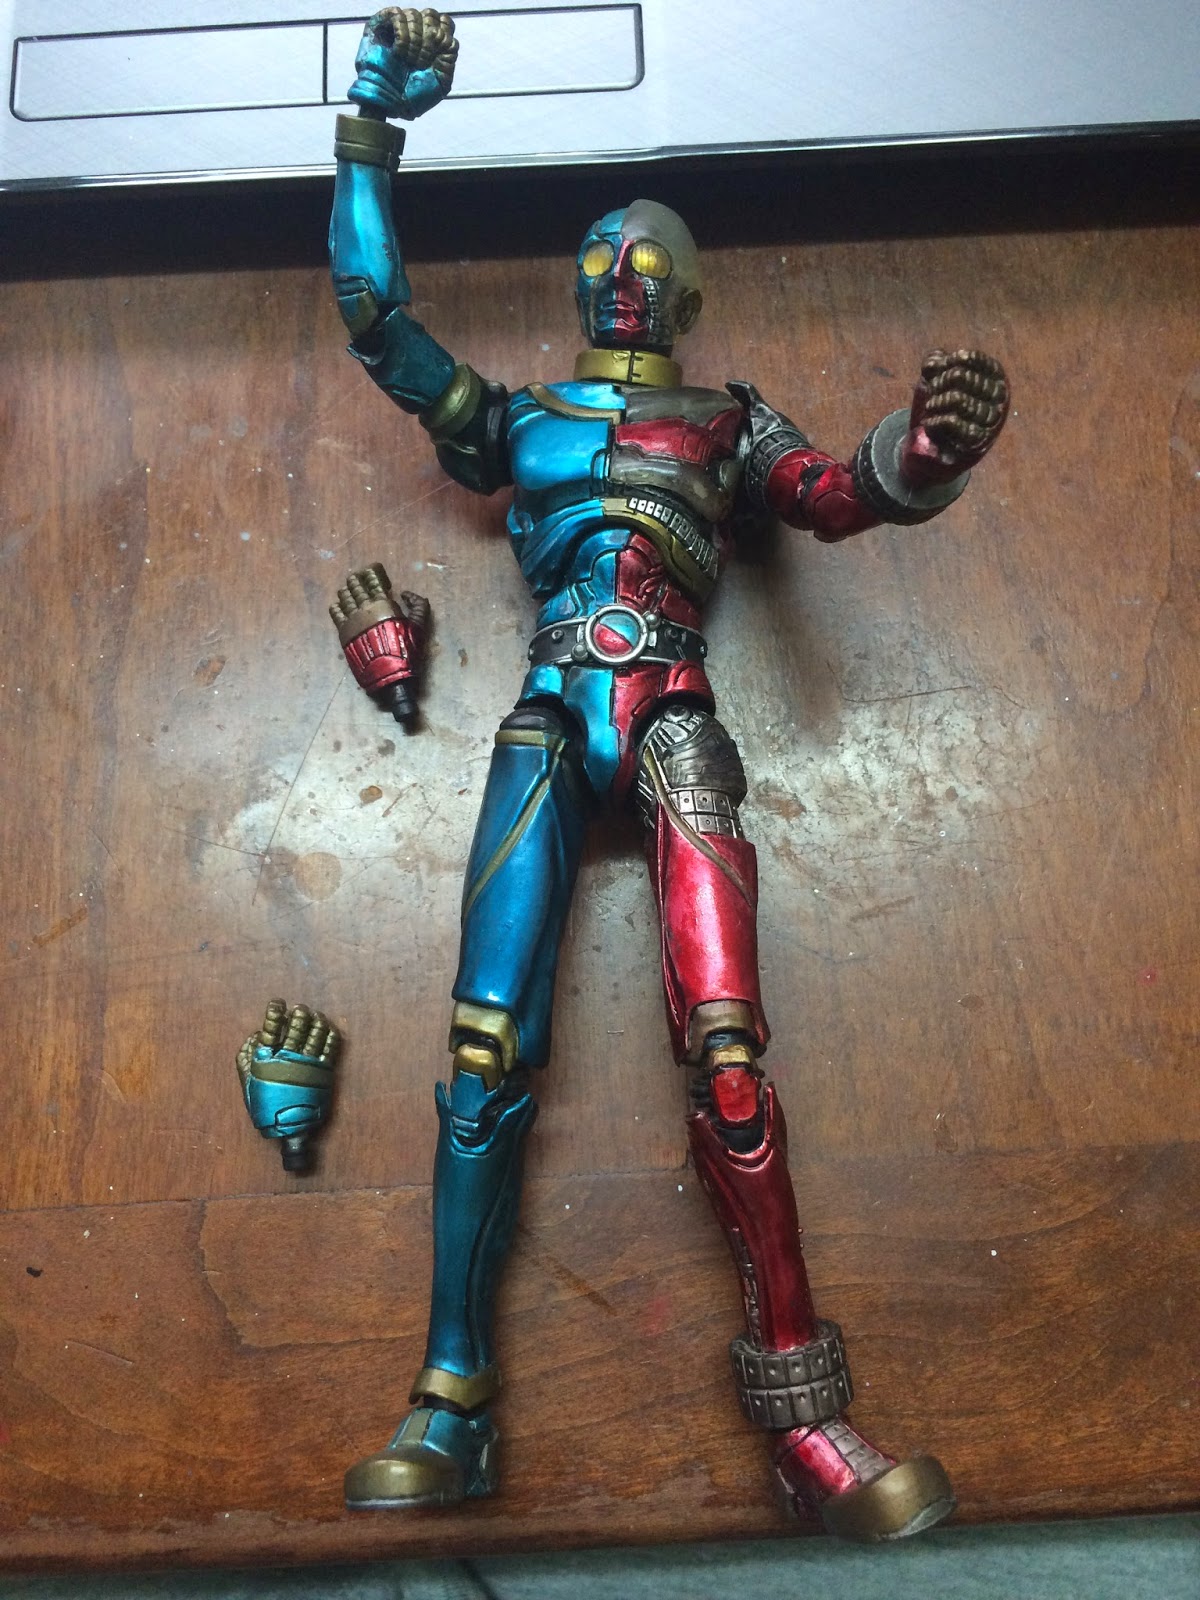
Here's a short tutorial (more like a list of tips) in doing weathering. Point in case this time: a Jetslinger weathering custom.

First thing first, in order to allow a SIC figure to sit on this thing, you have to remove those plastic connectors on his seat. USe a handsaw to cut them off like so:


Now your SIC Faiz can sit nicely on the bike.

Now then. there are a lot of ways to weather a bike and you can find all sorts of tutorials on the net teaching you how to do it. I'll share some of them in summary over here for you:

Weathering is all about showing stains, wear and tear, rust and erosions. To achieve this, you have to:
1) Dry brush opposing colors over the surfaces
2) Certain areas, you may consider sanding it to remove the colors to show erosion or wear. Sometimes you can paint two layers of colors on a surface and then sand the first layer off on certain areas to show wear. Add some rust brown paint over the areas where the two colors meet and you have rust
3) Dry brush over edges, lines, corners etc. This brings out the weathering effect
4) You want burnt effect on exhausts? Dip our brush over a heavily thinner-ed heavily paint filled matt black pool and then wipe over the edge of the exhaust leaving small pools of thinner filled matt black paint over the edges. These will dry off to look like the exhaust end has seen some heavy fiery discharges
5) Do linings over lines, edges etc. Panel liners can also be used to create shadows. Dip your tip on the panel liner ink pot heavily let the tip soak up some of those diluted paint and then splash them over corners to create shadows or wear.
6) Metallic silver are a nice color to use for weathering especially over black surfaces. Use this color to your advantage, you can even paint it over tyres and other areas that consist of different colors. Most of the time, you drybrush it voer the surface.

Well that's about all I can remember about the techniques I used to make this weathered Jetslinger. Hope it helps. Enjoy the photo gallery :)


The set of photos below will show you the difference between a weathered version and anoriginal version of the jetslinger :) I did this commission for a friend. One day I will make a SIC weathered version, complete with a lot more added details, weapons, vanes etc :)


Custom SIC Black Kikaider

A quick tutorial on a custom commissioned by a friend long ago which I finally got around to do it in the last couple of days. I underestimated its complexity and cost me precious time for the weekend with an anticipation of hard work in the coming weeks in my office but it is what it is, I rather finish this custom for he customer then leaving it until the last minute when I might still be bogged down with office work.

So here it is, custom black kikaider. The original Black kikaider costs about S$120. I did this commission for less than half of that ;p simply because I under estimated the amount of work required for it. Beware and always think though the process before the custom!!


The Kikaider figure I was told to use to make the black version custom was from the Kikaider and Side Machine set. The original lack kikaider figure follows the same mold as this set.

First thing first, sand the figure as much as possible.


Then paint all the on transparent surface with a dry layer of metallic silver. I did 2layers of this silver to make sure the later black layers shine.


Then paint brass paint (mixed with a slight touch of transparent orange to make it look more gold) over those relevant areas.

Next, paint a gloss bright blue layer over the areas where there are suppose to be blue lines. You will probably need 2 layers of these gloss bright light blue layer to make sure they will shine out amidst the black later. Don't worry about overspill. That will be taken care of later.
 

Next come the crucial part but before you proceed, take apart the figure first so that its a lot easier to paint later. Next paint clear orange over the transparent areas. Make sure mix a lot of thinner over a lot of clear orange and spread them over the transparent area (and the belt buckle) to ensure the orange color shines though.


The most challenging (or frustrating) part comes next; painting gloss black over most of the figure's area. Normally painting gloss black is a joy as gloss black don't require a lot of layer and it practically covers any color beneath it without them showing though. However, for this custom, there are  lot of thin blue lines across the body that criss cross around the gloss black areas... a lot ;p

First I paint as much of those areas not affected by blue lines as much as possible as fast as possible. I paint the areas between the blue lines as well. I let these dry and then I get down with a tiny brush and patiently painted the edges of each blue lines with gloss black. It took hours and a couple of layers to make the gloss black shine out.

After all that, I have to go though the entire body to do touch ups e.g. areas not covered by the gloss black layer (they are very obvious as they stand out against the dark gloss black and very annoying, these need to be settled before the topcoat or the custom can be spoilt), overlapping gloss black paint over areas where gold or light blue lines should be, etc.

Lastly, when all the paint has dried, I sprayed a layer of gloss topcoat over the figure and let that dry.

At last done, the figure actually looks more glossy and more golden than in the photos below but my iPhone don't seem to capture that zzzz. There were a couple of overlapping paint areas I missed and later repaired after I took the photos below too.


And that's it. Until next time :) If anyone wanted to message me, please be patient as I will be quite busy with work next couple of weeks so I might be slow in replying, maybe.